Wednesday, December 28, 2011

Projects Update

Well I would like to start off giving you guys a quick status update of my planned out projects.  This does not include any kind of order or anything.


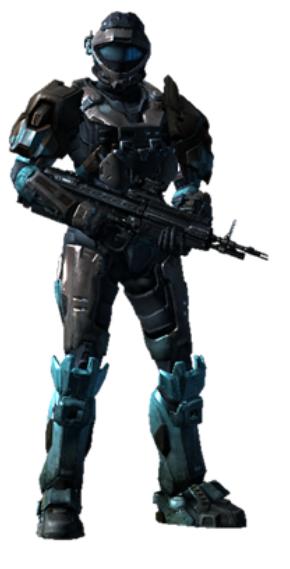
Halo Armor Suit - I have got 5/15 pieces constructed so far.  Due to the weather (I can not fiberglass if its below 45 degrees outside), this project might go on a bit of a hold.  I do not want to build up a bunch of paper armor pieces that I can not reinforce.  If I can find a place I can store all the pieces I will continue to construct them, but the project as a whole will most likely not be finished until spring.
 
Needle Rifle -  I am really excited to be finally starting this project.  The base of gun is going to be a homemade nerf gun.  This will be the first spring powered homemade nerf gun I will have made ( I tried a while ago and failed, did not make the plunger head seal well ).  I will actually be following a guide this time so hopefully everything will work when its done.  The shell of the gun will be made the same way I have been making my armor suit, but because I can not find a pepakura file of the needle rifle, I will have to make this from scratch.  I have not worked out all the fine details of this project, but I am hoping I can add some nice LED lighting on this project.

Halo Assault Rifle -  I came up with this project in the past two days.  I don't know how much I really want to give out about this project.  I will how ever say that the base of this gun will be a modded Nerf gun ( I do not currently have the gun for this project yet ).  I will be replacing most of the internals on this gun to increase the performance, and also adding a flash light, and display to simulate the gun in the game.
 
Halo Spiker - Most of this project will be just seeing how much cosmetic parts I can add to a Nerf Maverick, and it still function properly.  I have two modded Mavericks that I picked up at either goodwill or for a very low price.  Not sure what all I will actually be able to add, have to see as I go, but the I will be making the blades, trying to wrap the handle in leather, and hopefully a few more cosmetic mods.


That is about it for the updates, I will be posting the write up for the chest piece in the next few days.  If you guys have any other ideas for working replicas from video games or another projects you think I can create, I would love to hear about them.  Always looking for new ideas for projects!


Sunday, December 18, 2011

Halo Amor Update - Helmet

Pepakura Helmet File
So a few of you have been waiting to see this for quite a while now, its not completely done yet.  I probably have another 30 minutes worth of fiber glassing before I will be ready to move on to bondo and paint.

So I used pepakura to make the base of the helmet.  All the pieces took up about 24 sheets of card stock to print out when everything was scaled out.  It took about four hours to cut out all the pieces, fold all the tabs, and glue them together.  There are about 600 or so tabs you have to glue, and you have to wait for the pieces to dry before you can add more pieces (process is slow).

Right Side View
 I forgot to take a picture of the helmet before I started applying fiberglass resin to it, partly because I did not know where my cord for my Treo was, and partly because I was excited.  You only get about 30 minutes to actually work with the fiberglass, before it starts to get too tacky to brush on.  I probably need to put another coat of fiberglass resin on the outside of the helmet, and finish applying the fiberglass sheets to the inside. 

Back Side View

Left Side View
Inside View (before fiber glassing)

Inside View (after fiber glassing)
Front View
As you might have noticed, it is currently not possible for me to see through this helmet.  I am not sure how I am going to go about the visor for this helmet  Its between using a motor cycle helmet visor (which will probably cost around 20 bucks) or making my own.  I want it so that you can not see into the helmet, but you can see outside of the helmet.  Ive seen some people mold plastic sheets and spray them with spray paint for tinting tail lights.  It ends up giving the visor a nice almost mirror surface, and is still pretty clear to see through from the inside.


I estimate that it will probably take me a few months to actually get this helm completely finished, I have no urge to spend hours outside in the freezing cold of winter.  I defiantly do not plan on doing the wet sanding, that needs to be done before painting, while its cold outside.  Other then that, I have be working on the chest piece and a few other of the smaller pieces.  I am going to try to have the crotch piece and at least one of the boots constructed by this time next week.  Once again if you have any comments or questions I would love to hear them, and thanks for visiting!


Wednesday, December 14, 2011

ETEC Final - Sentry Gun

Gun and RFID Box (fully assembled)
Well my friend Bobby and I  managed to finish our final project with no time left.  After spending Wednesday and Thursday fixing one problem after another we finally got it done.  Due to technical limitations it did not perform exactly the way we wanted but it did preform its job. 

For our project we made a sentry gun security system.  It was controlled by a basic stamp micro controller.  We also used two standard servos, a PING ultrasonic sensor, and a RFID reader.

The first problem we ran into was when the code on the basic stamp got to the line where it would try to read a RFID tag, it would hang up until you swiped a tag.  We solved this problem by using two basic stamps to control our project instead of one.  The board with the RFID reader fed two inputs to the other board that would give the out come of a tag being swiped.

RFID Tafs
Once we got that figured out we were able to control our gun the way we wanted.  We wanted it setup so that an authorized tag would temporarily disable the gun allowing you to walk by without getting shot, and after swiping a bad tag it would shoot the gun to keep anyone from trying to tamper or get access by swiping a bunch of tags.

If no tags are swiped then the gun waits until the PING ultra sonic sensor finds a object within range.  We wanted to set this range to five feet but found that at five feet the gun was getting interference, so we had to set it the range to about three and a half feet.  Once the ping found an object it would run through checking code.  The checking code would first check to make sure the object was still there, if so it would shoot, if not it would rotate counter clockwise a few degrees.  It would continue that check until it either shot six times (the amount of darts in the clip) or rotated CCW four times.

To rotate and shoot the gun we used standard servos.  We had one standard servo connected to a piston that would push our darts into a flywheel.  The other servo was mounted into the base of the gun to allow it to move the top portion of the gun.

Dart
The darts are launched using a flywheel, which is two wheels spinning in opposite directions.  We used two dc motors and connect wheels to them.  The motors are powered by their own nine volt battery.  Since the stamp can not handle the amount of current the motors need, we had to use a driver chip.  The driver chip is basically a darlington pair, this allows us to use the stamp to turn on and off the motors and still allow them to use a separate power source.  Once basic stamp tells the gun to shoot there is a sight pause so the motors can get to speed, and then the piston servo pushes a dart into the flywheel.

The clip of the gun gave us a lot of issues, the first being how the darts are weighted.  We wanted to use a gravity feed system, where the darts by their own weight would fall perfectly into place, but since the darts are heavier in the front then the back it would cause them to nosedive in the clip and cause a jam.  The easiest solution to this problem was to use batteries as weight to push the darts down.  We also had to add a piece of wood inside the clip to make sure the darts could not move around. 

Gun Box (inside)
Overall I am very pleased with our project, but there are a few things I think that could of made it better.  First off we were very limited to what electronic devices we had, that we only had about five weeks to finish the project really limited what we could do.  I think if I were to continue this project I would use an IR sensor instead of the ultrasonic.  The ultrasonic is nice, but for this application there are just way to many things that can go wrong.  I would probably also use an RF transmitter and receiver instead of the long strands of wire we used to connect the two boards.  Even though with RF it is easier to get around it, I think the overall appearance would be nicer.  I would also increase the clip capacity so that it can hold  more then six darts.  

I think that about sums up the entire project if you have any questions, concerns, or comments I would love to hear them!

A few more pictures:


RFID Box (inside)
RFID Box (outside)
Gun with cover off

Gun and RFID Box assmebled
Gun Box (side view)

Friday, December 9, 2011

Halo Armor Suit

     Hey guys, so I have began to work on my halo armor suit, but I can not currently find the usb cable for my phone so I can not upload any pictures yet.  Since I am not able to load any pictures I figured it would be a good time to give a quick overview of how the project will be created and why I decided to start this project.

     So the idea behind this project really started from my enjoyment of modding nerf guns.  The huge problem with the current line of nerf guns is that most of them are all reverse plunger, which cause some issues when you put powerful springs in them.  So the easiest work around is to make your own nerf gun.  This is done mostly with the use of pvc and cpvc pipe, but I wanted to create something unique.  Most homemade nerf guns end up looking something like what you see on the left.

     But as you can see, most of these guns look pretty boring.  So I figured the easiest way to kind of spice them up is to build some kind of shell to go around the gun it self.  But what kind of shell should I use?  I don't want anything that looks too much like a real gun, so I was thinking why not create my favorite gun from Halo Reach.  So I decided I wanted to try to create the Needle Rifle.  The Needle Rifle is a pretty massive size gun, which would allow me to hide all the internals of the nerf gun.

      So after spending a few minutes searching the internet to see if anyone actually had created a Needle Rifle before (no need to recreate the wheel), I came across this website http://405th.com/.  The 405th is a forum where people post designs and finished projects of not only items from Halo, but other games as well.  They create most of these objects using Pepakura, which is a method of folding paper to create items.  Most people have made a box like this sometime in their life-time.  Well that is basically how they create this complex armor pieces and weapons. Here is an example of the pepakura file for the Halo chest piece:
 

     So as you can see its a pretty time consuming project, after you cut all the pieces out you gotta glue and fold them to make the paper model.  Once that process is done, you take put a few coats of fiberglass resin on the outside of the armor, and on the inside you put fiberglass resin and fiberglass sheets.  The fiberglass gives it a lot of strength and allows you to add bondo and sand the pieces to make them look smooth.  After the fiberglass and bondo is done you can add paint and any other finishing touches you want, like LED lights etc.  The color scheme I have planned for this suit is going to resemble my Halo character.  Even though not all the armor, if any, will actually match my character.  I decided against going with the common Master Chief colors, because I am not Master Chief.  Well that is about it for this post, I will hopefully find my usb cable this weekend, if not I will find some other way to upload pics.  If you have any questions feel free to ask =).


Sunday, December 4, 2011

Welcome

Hey guys, welcome to my blog!  Here I will be posting pictures and write ups of the projects that create in my free time.  These projects can range from anything to electronics, home made costumes, modified/homemade nerf guns, and anything else I decide to build.  Here are a few examples of whats to come....


  • Iron Man Arc Reactor
  • Sentry Gun - Final Project for Electronics Class
  • Halo Spartan Suit
  • Halo Needle Rifle (that shoots nerf darts)
  • Wind and Solar powered battery charger

These are just a few projects that I would like to try and finish in the next few months, and I will try to keep you guys updated as the projects go along.  The write up for the Sentry Gun should be up within the next week or so (depending on how busy I am with finals.als), and I also just purchased the card stock to begin working on my helmet for the Halo suit.